How to use Figma Motion: a Practical Guide
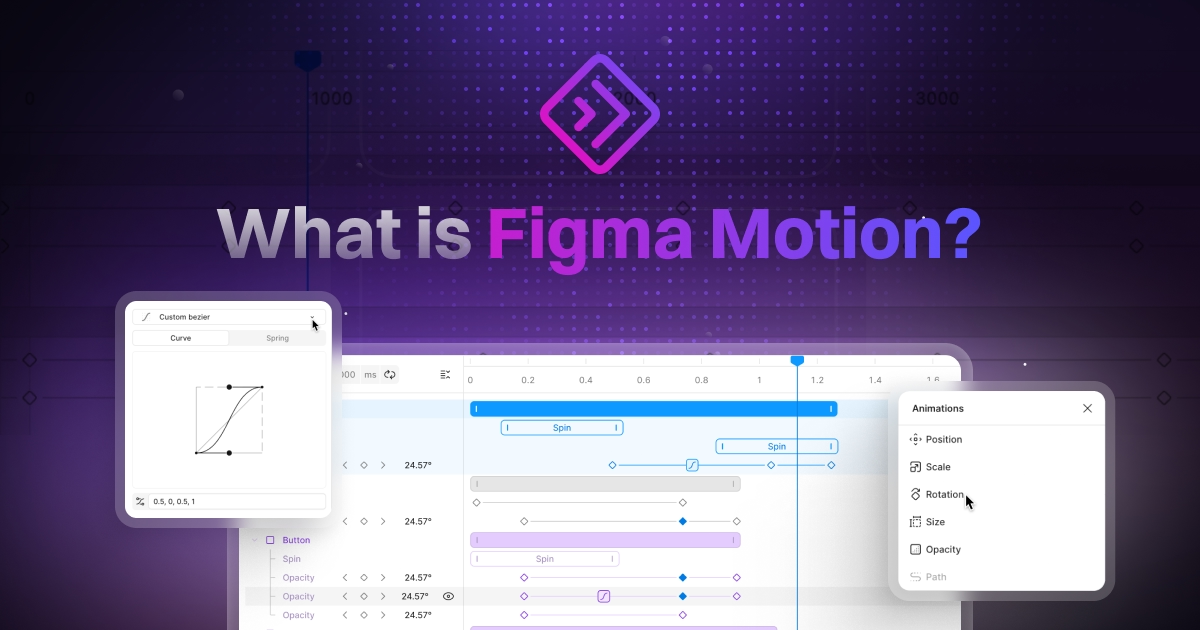
table of content
Figma Motion turns the design canvas into an animation tool, no exporting to After Effects, no handoff.
This guide walks through animating your first sequence, from enabling Motion mode to exporting the result.
We animate for SaaS clients daily, and this is what actually works once you're in the beta, not just what the docs say.
Key takeaways
- Figma Motion lives in the toolbar as a mode switch, not a plugin, and works on any plan with edit access.
- The timeline runs in seconds and milliseconds rather than individual frames, which is the biggest workflow shift if you're coming from After Effects.
- Easing is what separates motion that looks intentional from motion that looks robotic, and it's the single fastest improvement a beginner can make.
- The AI agent is genuinely useful for a first-pass UI animation, but it falls apart on physics and weight, so plan to refine anything with real movement by hand.
- Export options are code (CSS, JSON, React) and MP4, GIF, WebM, or Animated SVG, Lottie export isn't supported yet.
Can Figma do motion design?
Figma Motion is Figma's native animation tool for creating UI animations, interactive prototypes, and motion directly on the design canvas.
And the answer is yes. Figma Motion lets you animate position, scale, rotation, and opacity directly on the canvas, then export the result as code (CSS, JSON, React) or as MP4, GIF, WebM, and Animated SVG.
Figma Motion was introduced at Config 2026 on June 24 and is currently available in open beta to anyone with edit access to a Figma file, regardless of plan. You can read the official announcement in Introducing Figma Motion: Your canvas now has a timeline.
Because it's built directly into the tool you're likely already using for UI design, the learning curve is less about a new application and more about a new way of working with layers you already understand.
That's a genuinely different starting point than picking up After Effects from scratch.
Getting started with Figma Motion
Before getting started, it's worth bookmarking Figma's official Motion documentation here, as new features are being added regularly while the product remains in beta.
Enabling Motion mode
Look for the mode toggle in the toolbar at the top of the canvas, next to Design and Draw. Select a frame and switch it to Motion, and a timeline panel opens at the bottom of your screen.
You can also select an individual frame and click the Motion icon that appears in the sidebar to switch just that frame, useful when you only want to animate one component without pulling the whole page into Motion mode.
Understanding the timeline
The timeline works in seconds and milliseconds, not individual frames. That's worth explaining, not just noting, because it changes how you think about timing.
In After Effects, you're used to thinking in exact frame counts, frame 12 to frame 18. In Figma Motion, you're thinking in duration, "this eases over 300 milliseconds."
For most UI motion that's actually a more natural way to work, since interface animation is usually spec'd in milliseconds anyway.
Where it becomes a limitation is anything that needs to sync precisely to a frame-based reference, like matching an animation beat to a specific video frame, which still needs to go through AE.
Organizing your file
Group your assets the way you'd pre-comp in After Effects.
Clean grouping before you start keyframing saves a lot of cleanup later, especially once multiple components are animating on the same timeline and you need to isolate one group to adjust its timing without affecting everything else.
Keyframe basics
Before adding your first keyframe, it's helpful to understand what changes when you switch from Figma Design to Motion.
In Design mode, you're creating static layouts and components. Motion mode introduces a timeline, allowing you to define how those elements move between states over time. Instead of focusing only on what an interface looks like, you're also designing how it behaves.
Keyframes are what make that possible. A keyframe captures the state of an object at a specific point in time such as its position, scale, rotation, or opacity. By placing two or more keyframes on the timeline, Figma Motion automatically animates the transition between them.
For example, you might set a button's opacity to 0% at the beginning of the timeline and 100% a few hundred milliseconds later. Motion interpolates the values between those keyframes, creating a smooth fade-in without requiring you to animate every frame manually.
Setting your first keyframes
Pick a layer, move it on the canvas at a given point on the timeline, and Figma records a keyframe.
Animating position on the X-axis is the simplest place to start, move an element, scrub back, move it again, and you've got motion.
Once that feels intuitive, layering in scale and rotation on the same object is a natural next step.
Anchor points
Where you set the anchor point changes how an object rotates and scales, the same principle as in any animation tool, so this is a basic you need to nail down.
Get this wrong and rotation or scaling will look like it's pivoting from the wrong spot, an icon that should rotate around its center will instead swing out from a corner, which reads as visibly broken even to viewers who couldn't tell you why.
It's worth checking before you keyframe anything that rotates.
The graph editor and easing curves
Figma includes a graph editor for adjusting the bezier curve behind each keyframe transition.
This is where flat, linear motion turns into something that actually feels considered, and it's worth spending real time here rather than accepting the default curve, since easing is doing more work for how "polished" an animation feels than almost any other single variable.
Easing and making motion feel natural
Linear easing looks robotic, motion that starts and stops instantly, with no acceleration or deceleration.
Ease-in and ease-out curves, where motion ramps up and slows down, read as smooth and intentional instead.
The reason this matters so much: almost nothing in the physical world moves at a constant speed and then stops instantly, so our brains read linear motion as artificial even before we can explain why.
Figma Motion also includes spring and preset options if you don't want to hand-tune a curve for every element. For anything with impact or weight, like an object landing, scaling the object down slightly one frame before impact gives you a squash-and-stretch effect that reads as far more natural than a flat stop, this is a classic animation principle borrowed directly from traditional and character animation, and it holds up just as well in UI motion.
All in all, the single biggest quality jump for beginners comes from replacing linear easing with custom ease-in-out curves.
Using the Figma Motion AI agent
You can prompt the agent directly on a frame to generate a first pass at an animation. In our testing, it handled UI layout animation well, on one iOS interface, it gave us three clean variations to choose from without much back-and-forth, which is genuinely useful when you're trying to explore a direction quickly rather than build one approach from a blank timeline.
Where it falls short: physics and weight. We asked it to animate a bouncing ball, and the result didn't hold up, no real sense of gravity or impact, the ball just moved between points on a curve.
The underlying reason is that physical motion depends on subtle, non-obvious timing relationships, acceleration due to gravity, energy loss on impact, that an agent trained mostly on UI patterns hasn't learned to reproduce convincingly yet.
For anything with physical weight or character motion, use the agent for a rough first pass and refine the timing manually.
We can conclude that Figma Motion's AI agent handles UI animation well but struggles with physics-based motion like bouncing or weight.
Working with shaders and effects
Config 2026 also introduced built-in shader effects you can prompt for directly, gradient maps, particle-style effects, and dynamic backgrounds without leaving Figma or reaching for external software.
These stack with your existing motion the same way other effects do, so you can layer a shader-driven background behind a keyframed foreground element without switching tools mid-project.
What shaders can and can't do
Figma's built-in shaders are designed to add visual polish, not replace a dedicated motion graphics or VFX tool.
They're ideal for enhancing UI, backgrounds, and interface animations with effects like animated gradients, procedural textures, and subtle particle-style visuals, all without leaving Figma.
Figma's target audience is primarily product, UI, and UX designers who want to add expressive motion without leaving their design workflow. If you're producing marketing videos, brand explainers, or film-quality visual effects, dedicated motion design software is still the better fit.
Exporting your animation
Export to video
MP4, GIF, WebM, and Animated SVG are all supported. Basic export works on any plan; higher-quality video export requires a paid Full seat.
Export to code
For dev handoff, copy your animation as CSS, JSON, or React-ready code straight from Dev Mode.
Every timing value, easing curve, and keyframe carries over, nothing gets reinterpreted by hand, which is the part of this workflow that actually saves the most time compared to a traditional handoff.
Export to Animated SVG
For lightweight, vector-based motion, icon animations, hover states, small UI details, Animated SVG keeps things sharp at any size without the file weight of video.
When to animate it yourself vs hire a studio
Figma Motion is genuinely good for in-product UI motion and quick component animation. For brand explainers, complex storytelling, or high volume output, the time cost adds up fast, and that's still work we do in After Effects, where the tooling for that kind of output is more mature.
This is where a studio like ours naturally fits, not because DIY doesn't work, but because there's a real ceiling on what's efficient to build yourself once the scope grows, once you're animating dozens of variations, syncing to voiceover, or need frame-accurate timing, the hours add up quickly, and that's usually the point where outsourcing starts making more sense than powering through it solo.
Quick reference: what to use for what
By this point, you should have a good understanding of what Figma Motion can do. The next question is where it fits within a broader motion design workflow.
While Figma Motion covers many UI animation needs, it's not designed to replace dedicated motion graphics software.
Here's a quick guide to when we'd choose Figma Motion and when we'd reach for After Effects instead.
Where to go from here
Figma Motion makes it easier than ever to create UI animations without leaving your design workflow. Whether you're prototyping interactions, refining onboarding flows, or preparing animations for developer handoff, it's a powerful addition to any product designer's toolkit.
If you're working against a deadline or need polished motion for an important launch, Motion The Agency can help.
We create UI animations, product explainers, and motion design for SaaS brands, combining the right tools and workflows for each project.
Curious how we'd approach your product? Get yourself a free sample so you can see our process before committing to a full production.
FAQ

Sam Jupp
Sam Jupp is the founder of Motion The Agency, with over 11 years of experience in research and marketing. He specializes in leveraging creative animation and motion design to craft compelling brand narratives and writes insightful content on industry trends.

In just a few questions, get a tailored estimate for your next video project.




Contact Us
Ready to elevate your brand? Contact us for your
Free Custom Video Sample